.svg)
Prerequisites: Administrator · Paper Business Cards Add-on
The paper business card ordering system is set up manually by Lemontaps. You start the process by completing a setup form – we will then configure the system for you. Setup usually takes 7 business days from the time we receive all required documents.
After the setup is complete, you have 3 weeks to test the system and provide feedback. Any changes requested during this period will be implemented free of charge. Adjustments after the feedback period are subject to a fee, starting at €99 net, depending on the scope of the changes.
How to start the setup
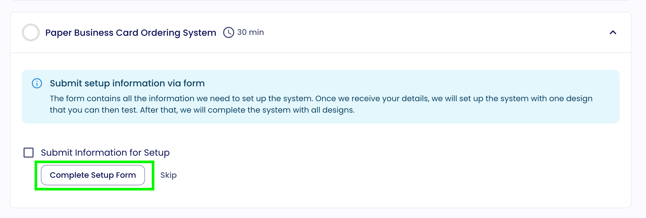
In your onboarding checklist overview, go to the "Paper Business Card Ordering System" tab, click Complete setup form, and complete all 6 steps.
If you have any questions before filling out the form, contact us at support@lemontaps.com.
What the form asks for
The form consists of 6 steps. Please prepare the following information and files in advance.
Step 1: Basic information
Your name, email address, and company name.
Step 2: Design & files
For each business card design, we require the following files. Please upload all files for each design together in a single ZIP file:
File 1: InDesign file
-
Final business card size, usually 85 × 54 mm
-
Fill the file with sample content – ideally a long name and all available information to ensure the layout works for all variations
-
If spot colors are used, define them in the design
-
Insert a placeholder QR code – we will replace it with the actual QR code of the digital business card. Note: QR codes can only be generated in CMYK colors.
File 2: PDF background without text fields
- Final size, usually 85 × 54 mm
- Background design only – without names, contact details, or QR code
File 3: PDF background with bleed
- Same design as File 2, also in the final size
- Including bleed (usually 3 mm)
Font files (.otf / .ttf)
-
Include all fonts used in the design.
Note: For the print integration with druckdiscount24, the final size must be 85 × 54 mm. If you are using your own print provider, please confirm their required final dimensions in advance.
In the form, you also specify:
-
How many designs should be configured
-
Which design should be selected by default
-
Whether certain designs should only be available for specific units (Note: Setup costs €99 net per unit)
-
Which QR code type should be used:
-
Online QR code (recommended) – links directly to the digital business card, profile updates are immediately visible
-
Offline QR code – works without an internet connection, profile updates are not automatically synchronized
-
No QR code
-
Step 3: Paper business card editor
When employees order paper business cards, they first complete an editor. This editor is directly linked to the digital business card, so fields such as first name, last name, and job title are automatically populated.
In this step, you define which fields appear in the editor and how they are configured using an Excel template (download here). Download the Excel template, complete it, and upload it again.
For each field, you can define:
-
Which Lemontaps field it is linked to
-
How the field should be labeled
-
Whether a help text should appear below the field
-
Whether a field should always have the same value for all cards (e.g. website or company name) – these fields are hidden completely
-
Whether a field should be read-only (the value is displayed but cannot be edited)
-
Whether a field is required
-
Whether a field should be configured as a dropdown – users select from a predefined list (e.g. job title or location); these fields are not automatically populated from the digital business card
Note: If a required field does not exist in Lemontaps, you can rename an unused field. Go to Business Cards → Profile Design → Contact Attributes.
Step 4: Shopping cart & ordering options
After completing the editor, users are taken to the shopping cart. In this step, you define which fields appear there.
Quantity
- Should the quantity be requested in the shopping cart?
- If yes: Which quantities should be available for selection?
Shipping address
-
Should the shipping address be requested with every order?
-
Options: User enters the address manually / User selects from saved address templates / User must select from address templates (manual entry not allowed)
-
If address templates are used: Upload an Excel file with the templates
-
Which countries should shipping be available to?
Billing address
-
The same options as for the shipping address.
Step 5: Permissions & approval process
Here, you define who is allowed to order paper business cards and whether orders must be approved before printing:
-
Who has access to the ordering system: End users & administrators or administrators only?
-
Should there be an approval process?
-
If yes: Which email addresses should be notified of new approval requests?
-
Should the approval process be unit-specific? (Setup: €99 net per unit)
-
If yes: Specify the unit name and responsible email address for each unit.
-
Step 6: Print provider & print file
You define how the finished print file should be forwarded after an order.
Option 1: Your own print provider
The print file is automatically sent by email to an address of your choice.
Option 2: Partner print provider druckdiscount24 (fully automated)
The print file is automatically forwarded to druckdiscount24 – no manual forwarding required. Recommendation: Contact Ms. Knipper in advance. She can advise you on paper, colors, pricing, quantities, and delivery times and can also provide sample cards upon request: V.Knipper@wksgruppe.de
For the druckdiscount24 integration, you need: Special reference number, available quantities and pricing (provided by Ms. Knipper), billing address, billing email address, and your preferred invoicing method (monthly consolidated invoice or one invoice per order).
Option 3: Combination of druckdiscount24 and your own print provider
For example, if druckdiscount24 does not deliver to all countries. Note: €99 net per additional print provider.
Option 4: Multiple print providers depending on the country
Each print provider receives the print file by email. Note: €99 net per print provider.
Connecting different countries
If multiple print providers are connected for different countries or regions, users first select their region when placing an order. The editor then opens, and the completed print file is automatically forwarded to the responsible print provider.
Print portal
In addition to the automatic email forwarding/integration of print files, the Lemontaps platform provides an overview of all orders in the order history.
There is also the option to receive separate access to a dedicated Print Portal, for example for people who do not have their own Lemontaps user account. The Print Portal provides a central overview of all previous orders. Please note that only one Print Portal login can be provided per organization.
Overview of possible additional costs
Depending on the configuration, the following costs may apply unless agreed otherwise:
-
Additional design: €99 net (one-time per design)
-
Changes after the 3-week feedback period: from €99 net
-
Creating a design without your own template: €99/hour
-
Unit-specific design or approval process: €99 net
-
Connecting more than one print provider: €99 net per print provider
Display the ordering system on the home page
After setup, you can optionally display the ordering system directly on the platform's home page so your employees can access it quickly without navigating to the account settings. This setting is disabled by default.
How to enable it:
-
Under the Home section, find Paper Business Cards.
-
Click the eye icon to enable the display.
The widget is visible on mobile but not in the native app.
Important: The widget is only displayed once the ordering system has been fully configured. If no ordering system has been set up, the home page tile remains hidden even if the setting is enabled.
For more information, see the article Customize Platform Visibility.
Frequently asked questions
What happens after I submit the form?
Once we have received your information and files, we usually configure the system within 7 business days. If you have multiple designs, we typically start with one design that you can test first before configuring the remaining designs. You then have 3 weeks to test the complete ordering process. Any changes requested during this period will be implemented free of charge. After that, a service fee starting at €99 net applies, depending on the scope of the requested changes.
Is the business card ordering system also available in English?
Yes, once you switch the Lemontaps platform language to English, the user interface will automatically be displayed in English. For the content of the digital business card to appear in English as well, English translations must be available for the corresponding profile fields. You can find more information in our article: How do I translate the digital business card profile?
If you would also like the field labels (e.g. Name, Position, etc.) within the editor to be translated, we offer this as a custom design adjustment for a one-time service fee of €99 (net) per design.
Is the business card ordering system available in other languages?
Currently, the system is only available in German and English.
What if I need changes to the design or process later?
No problem – you can request changes at any time. For simple adjustments, we charge a flat service fee of €99 net. If the required work is more extensive, we will inform you of the expected costs in advance.
Can the unit admin receive approval emails?
Yes. In Step 5 of the setup form, you can specify a separate email address for each unit that will receive notifications for new approval requests. Setting up a unit-specific approval process costs €99 net per unit.