.svg)
Requirements: All users · Sales Add-on
With the AI Voice Assistant, you can capture conversation details as a voice note. AI automatically turns your recording into structured information, such as a transcript, summary, or follow-up email. You can find all your voice notes under AI Notes and assign them to one or more contacts.
Where can I find AI Notes?
- In the browser (user view): Open AI Notes in the menu. Here, you can see all notes you have recorded yourself.
- In the browser (admin view): Go to Contacts → AI Notes. Here, you can see the notes from your entire team.
- In the app: Tap AI Notes in the bottom navigation bar.
Record a voice note
In the app
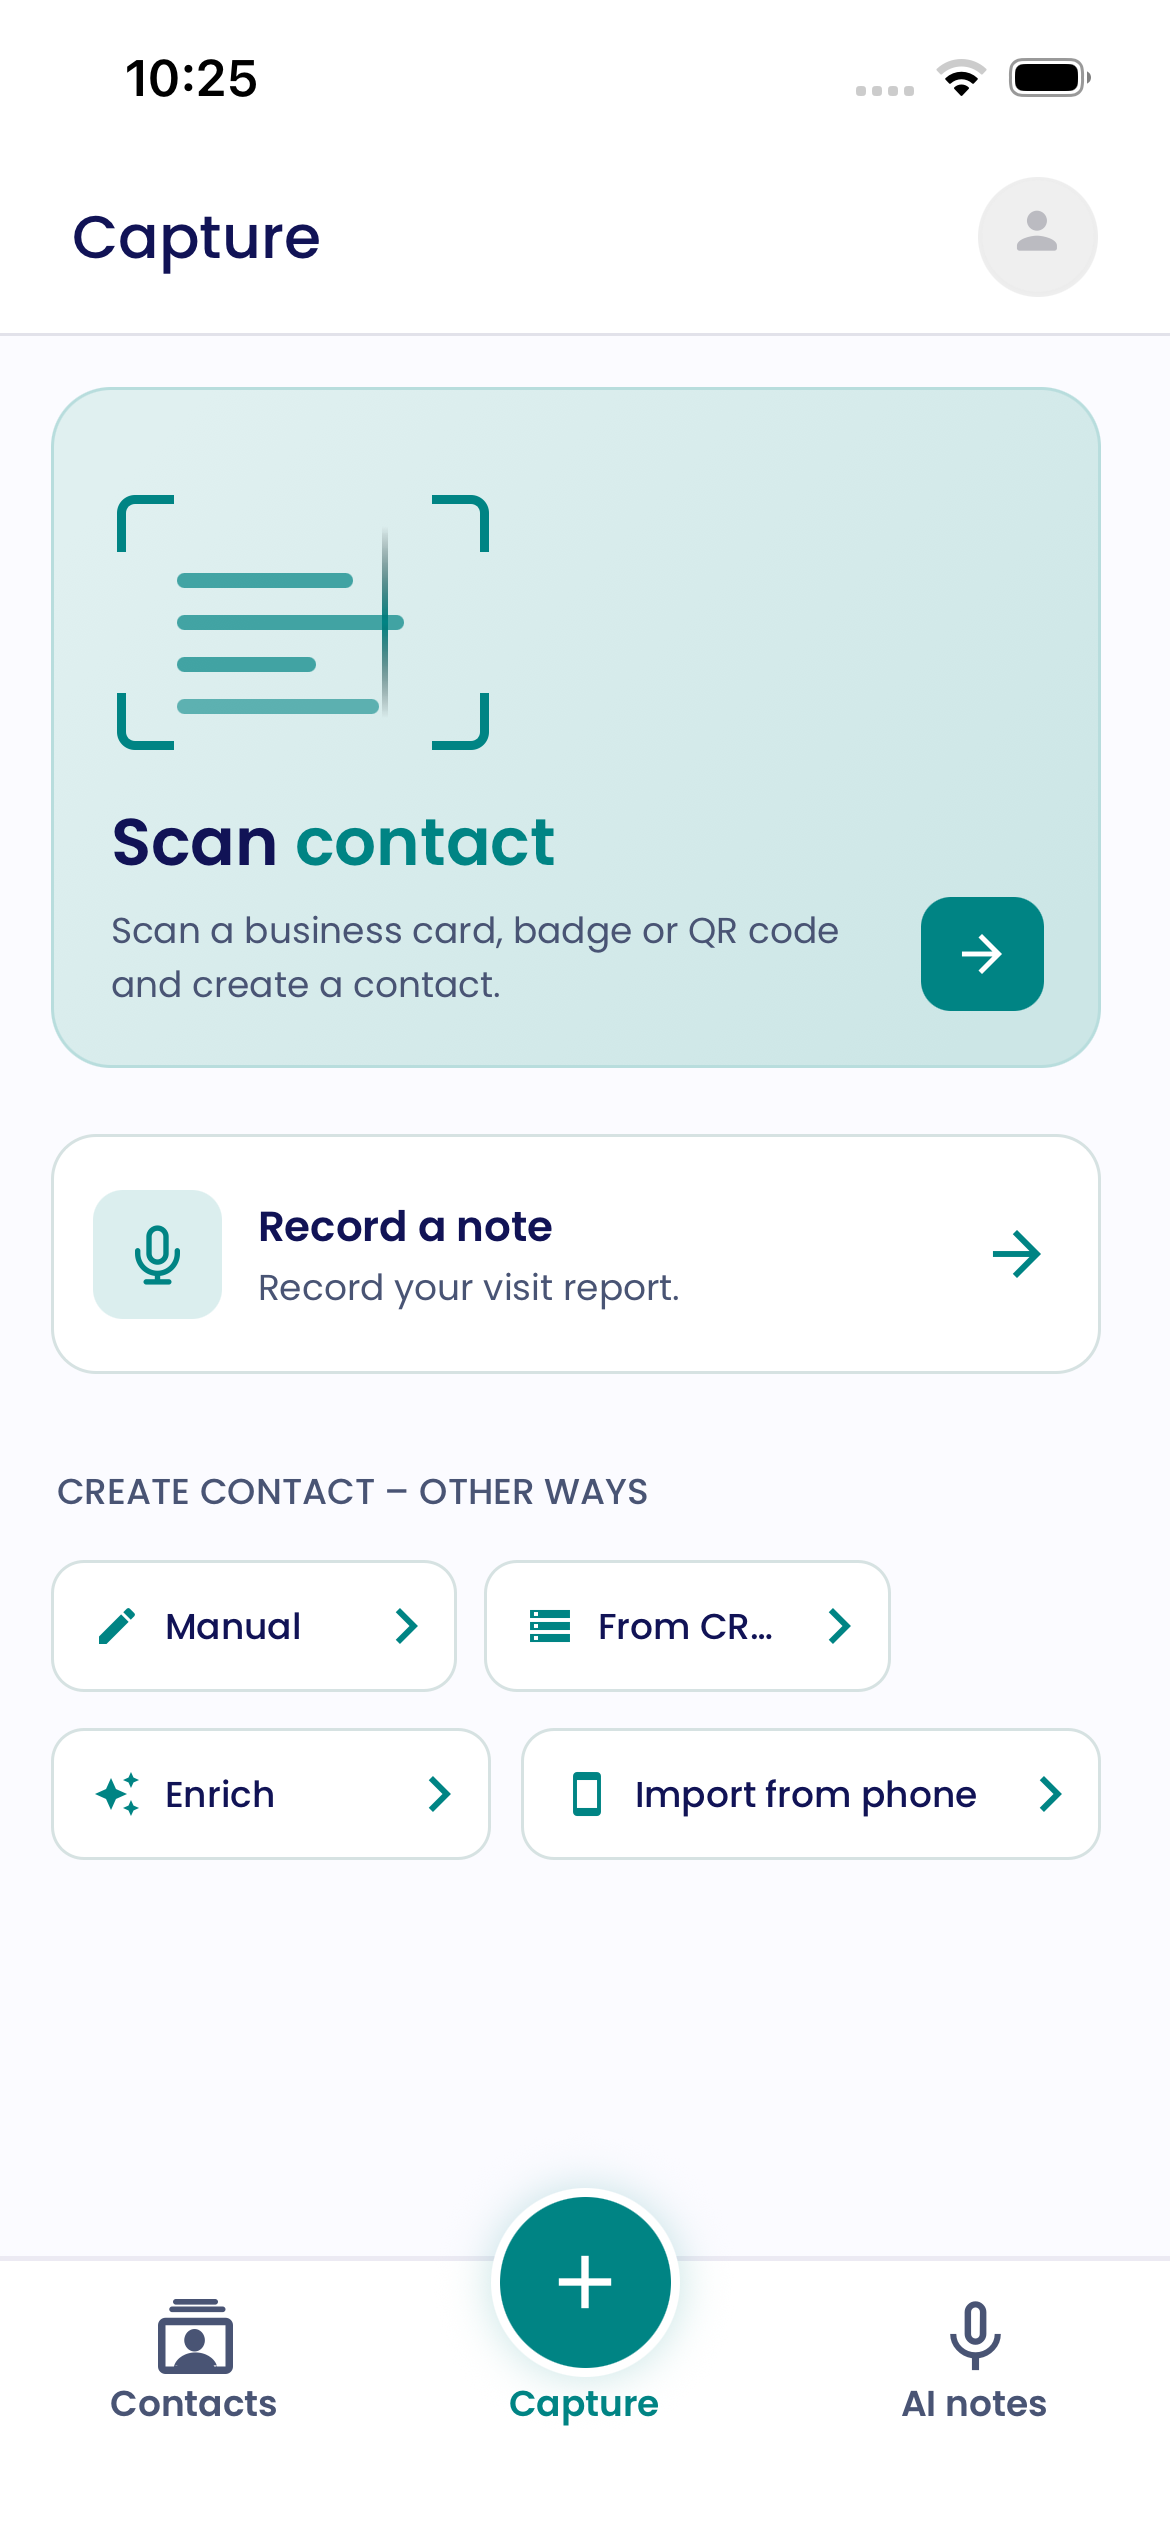
- Under Capture, tap Record note. This section is displayed directly when you open the app. Alternatively, open the AI Notes tab and tap the plus icon at the top.
- Recording starts immediately.
- Tap Pause to pause the recording at any time and Resume to continue.
- Optional: Tap Link contact at the top to assign the note directly to a contact (see the “Assign a contact” section).
- Tap Done.
The note is then uploaded and processed by AI. You can see its current status directly on the note in the overview.
In the browser
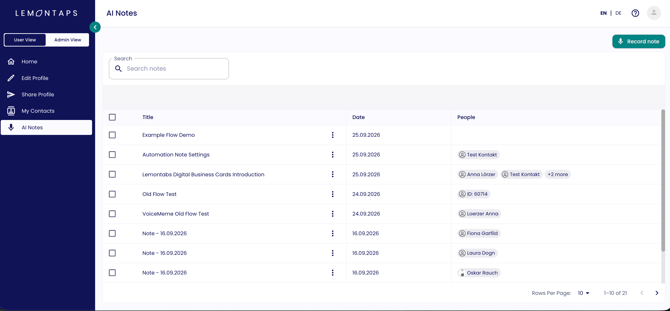
- Open the AI Notes tab.
- Click Record note.
- Record your conversation notes and click Done.
The note then appears in the overview and is processed by AI. You can assign it to a contact at any time afterward.
Directly within a contact
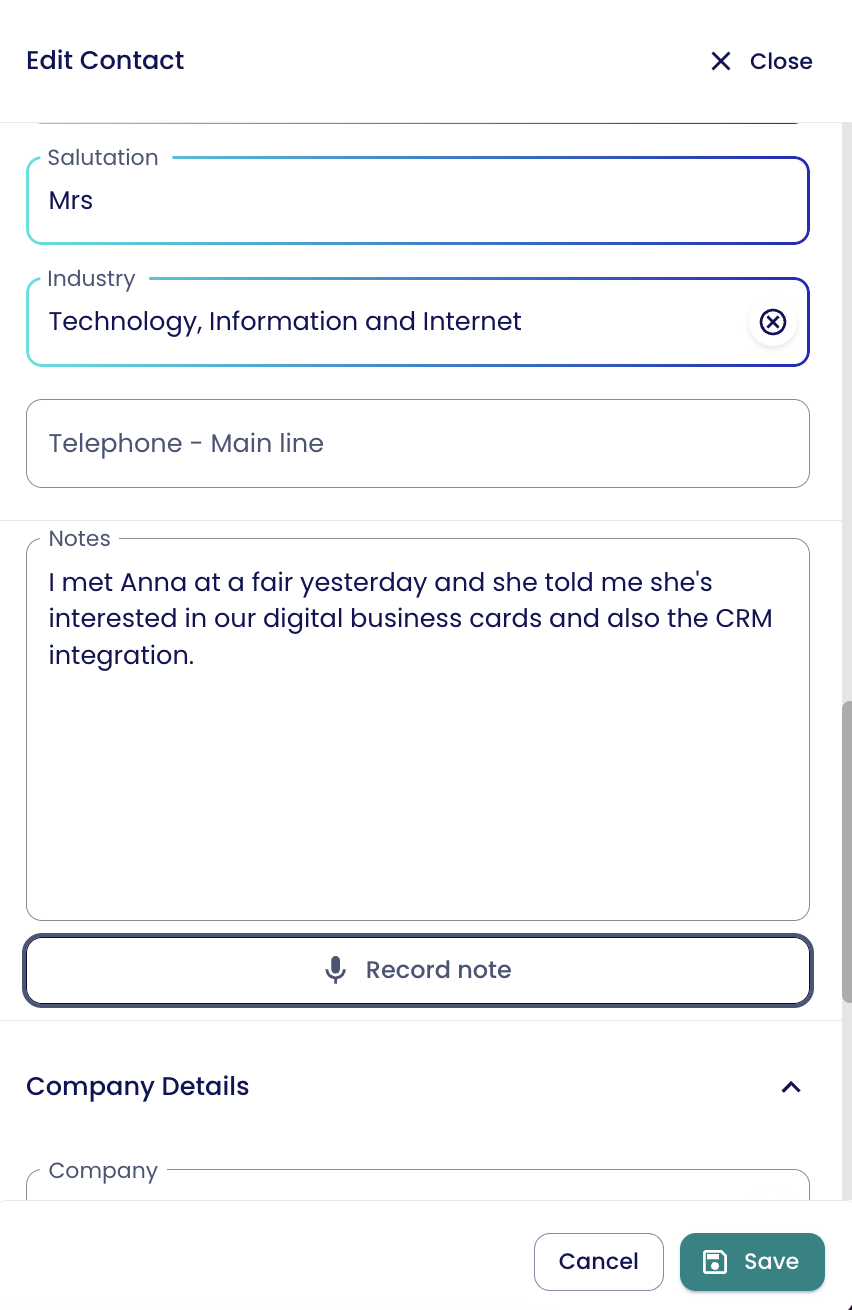
You can also record a voice note directly within an existing contact:
- Open the contact in your Contacts overview.
- Click Record note below the notes field.
- Record your conversation notes and click Done.
The note is automatically assigned to the contact.
Depending on your Automation settings, the following actions may then take place within the contact:
- Notes field: The full transcript or an AI-generated summary is automatically added, or the notes field remains empty. Existing notes are retained. If you record additional voice notes, the content of each new recording is added below the existing content with spacing between the entries.
- Contact form: Recognized information such as job title, phone number, email address, or company is automatically added to empty fields. For more information, see the section “Automatically fill the contact form (Fill Form).”
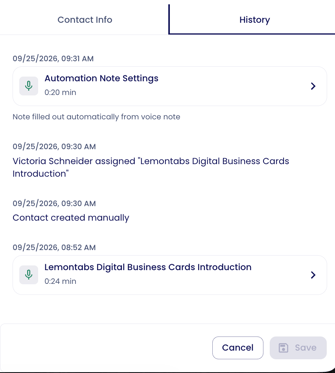
You can then find the voice note itself in the contact’s History and under AI Notes.
Switch between a note and contact
- Click an assigned contact within the note to open that contact.
- Within the contact, you can find all assigned voice notes in the History section. Click an entry to return to the note.
- In the app, use the arrow in the top-left corner to return to the note.
Recording duration
A voice note can be up to 15 minutes long. During the recording, you can see how much time has elapsed. When only two minutes remain, a notification appears and the remaining time is displayed as a countdown and highlighted in red.
If you reach the limit, the note is automatically saved and uploaded, so no content is lost.
Voice note overview
In the AI Notes overview, you can see the title, date, and assigned contact for each note. In the admin view, the Owner column also shows who recorded the note. In the app, the recording duration is displayed as well.
Use the search bar to find a specific note.
Open a note and use AI-generated results
Click a note in the overview to open it. The detail view includes:
- Title: AI automatically suggests a title. You can change it using the pencil icon.
- Date and recording duration
- Audio: Use the player to listen to the recording again. In the app, tap Audio.
- Assigned contacts
- The transcript and results of the AI actions
Transcript and AI actions
AI actions are outputs generated by AI from your voice note. All active AI actions are automatically performed for every new voice note.
After each voice note, you can view the complete transcript so you can always review exactly what was said.
Additional AI actions may also be displayed automatically. An AI action analyzes the transcript using an AI prompt, for example, “Create a summary of the conversation,” and displays the result in a separate view. Which AI actions are available, what they are called, the order in which they appear, and the prompts they use are configured under Automations. For more information, see the article Set Up Automations for Contacts.
Use Copy to copy the content of a view to your clipboard. You can also edit and customize the generated content.
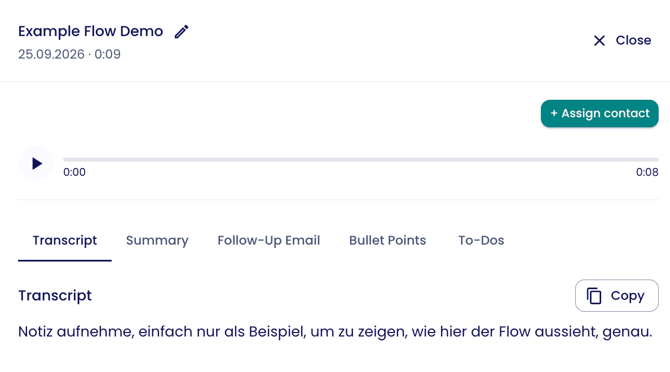
Examples of AI actions
The AI actions available in your notes depend on your organization’s configuration. Typical examples include a summary of the conversation, a ready-to-use follow-up email, the most important points as bullet points, or a list of tasks such as sending a quote or scheduling a meeting.
Your organization can also create custom AI actions, such as Objections or Strategic Insights.
Automatically fill the contact form (Fill Form)
Lemontaps can use information from your voice note to automatically fill in fields in the contact form. AI analyzes the transcript and transfers relevant information, such as job title, phone number, email address, or company, to the corresponding fields.
Fill Form runs automatically after each recording within a contact if Automatically fill the contact form is enabled under Automations. Information is only added to empty fields. Fields that already contain information remain unchanged.
Important:
- Recognition is probability-based.
- Results may vary depending on the content of the conversation.
Fields filled in by AI are highlighted in blue. You can also see whether Fill Form was performed in the contact’s History.
Provide additional AI context
If certain fields are frequently not filled correctly, you can provide the AI with additional context:
- Go to Contacts → Contact Fields.
- Find the relevant field, click the three dots, and then select Edit field.
- Navigate to Voice Note – Fill Form Settings.
Here, you can give the AI specific instructions on how information should be interpreted, similar to writing a prompt in ChatGPT.
For example, for a field such as Product Interest, you could define:
- Select Option A when terms such as “business card” or “digital business card” are mentioned.
- Select Option B when other specified keywords are mentioned.
This helps the AI better understand internal terminology or abbreviations and fill fields more reliably.
- AI context can be provided for: Custom fields and CRM fields (e.g. fields imported from HubSpot).
- AI context cannot be provided for: AI fields (e.g. Industry) and certain system fields such as attachments or signature.
Assign a contact
A note can be assigned to one or more contacts. You can also save it without assigning a contact and add one later.
- Open the note and click + Assign contact.
- Search for the contact you want to assign. Lemontaps searches your Lemontaps contacts and, if a CRM integration has been set up, contacts from your CRM as well.
- Select the contact. Alternatively, you can create a new contact directly.
Delete notes
- Open AI Notes.
- Select the notes you want to delete using the checkboxes. You can select multiple notes at once.
- Click Delete and confirm.