This article explains the steps a user goes through when Account Claiming is active in your organization.
It complements the Account Claiming setup guide and helps you understand what happens from the user’s perspective.
Scenario 1: Existing users are manually claimed
When an already self-registered user is manually added to your organization:
-
The user is assigned to your organization with all existing settings
-
The user does not receive a separate notification about Account Claiming
-
From the user’s perspective, nothing changes regarding login
The account then appears in the management dashboard and can be centrally managed.
Scenario 2: Automatic Account Claiming is active and a user registers
When a new user registers while automatic Account Claiming is enabled, the following steps occur:
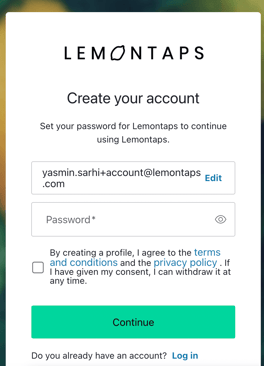
1. Registration
The user opens the "Registration page", enters their work email and chooses a password.
2. Email Verification
The user confirms their email address via the verification link sent by email.

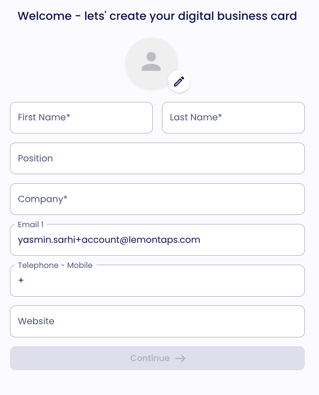
3. Short Onboarding
The user goes through a brief onboarding to provide basic information for their digital business card.
Required fields:
-
First name
-
Last name
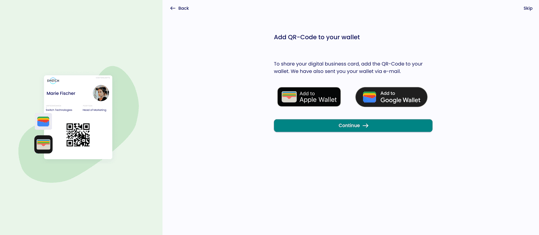
Next, the user can add their QR code to their wallet.
Note: The onboarding flow is system-defined and cannot be customized.
4. Account Access
After onboarding, the user lands directly in their account:
-
With your organization’s settings
-
Assigned roles and permissions
-
Identical end-user experience as all other users
If the Approval Process is Active
If the optional approval process is enabled:
-
The user is already created in the system
-
The digital business card can already be used
-
Admins receive a notification about the self-registration
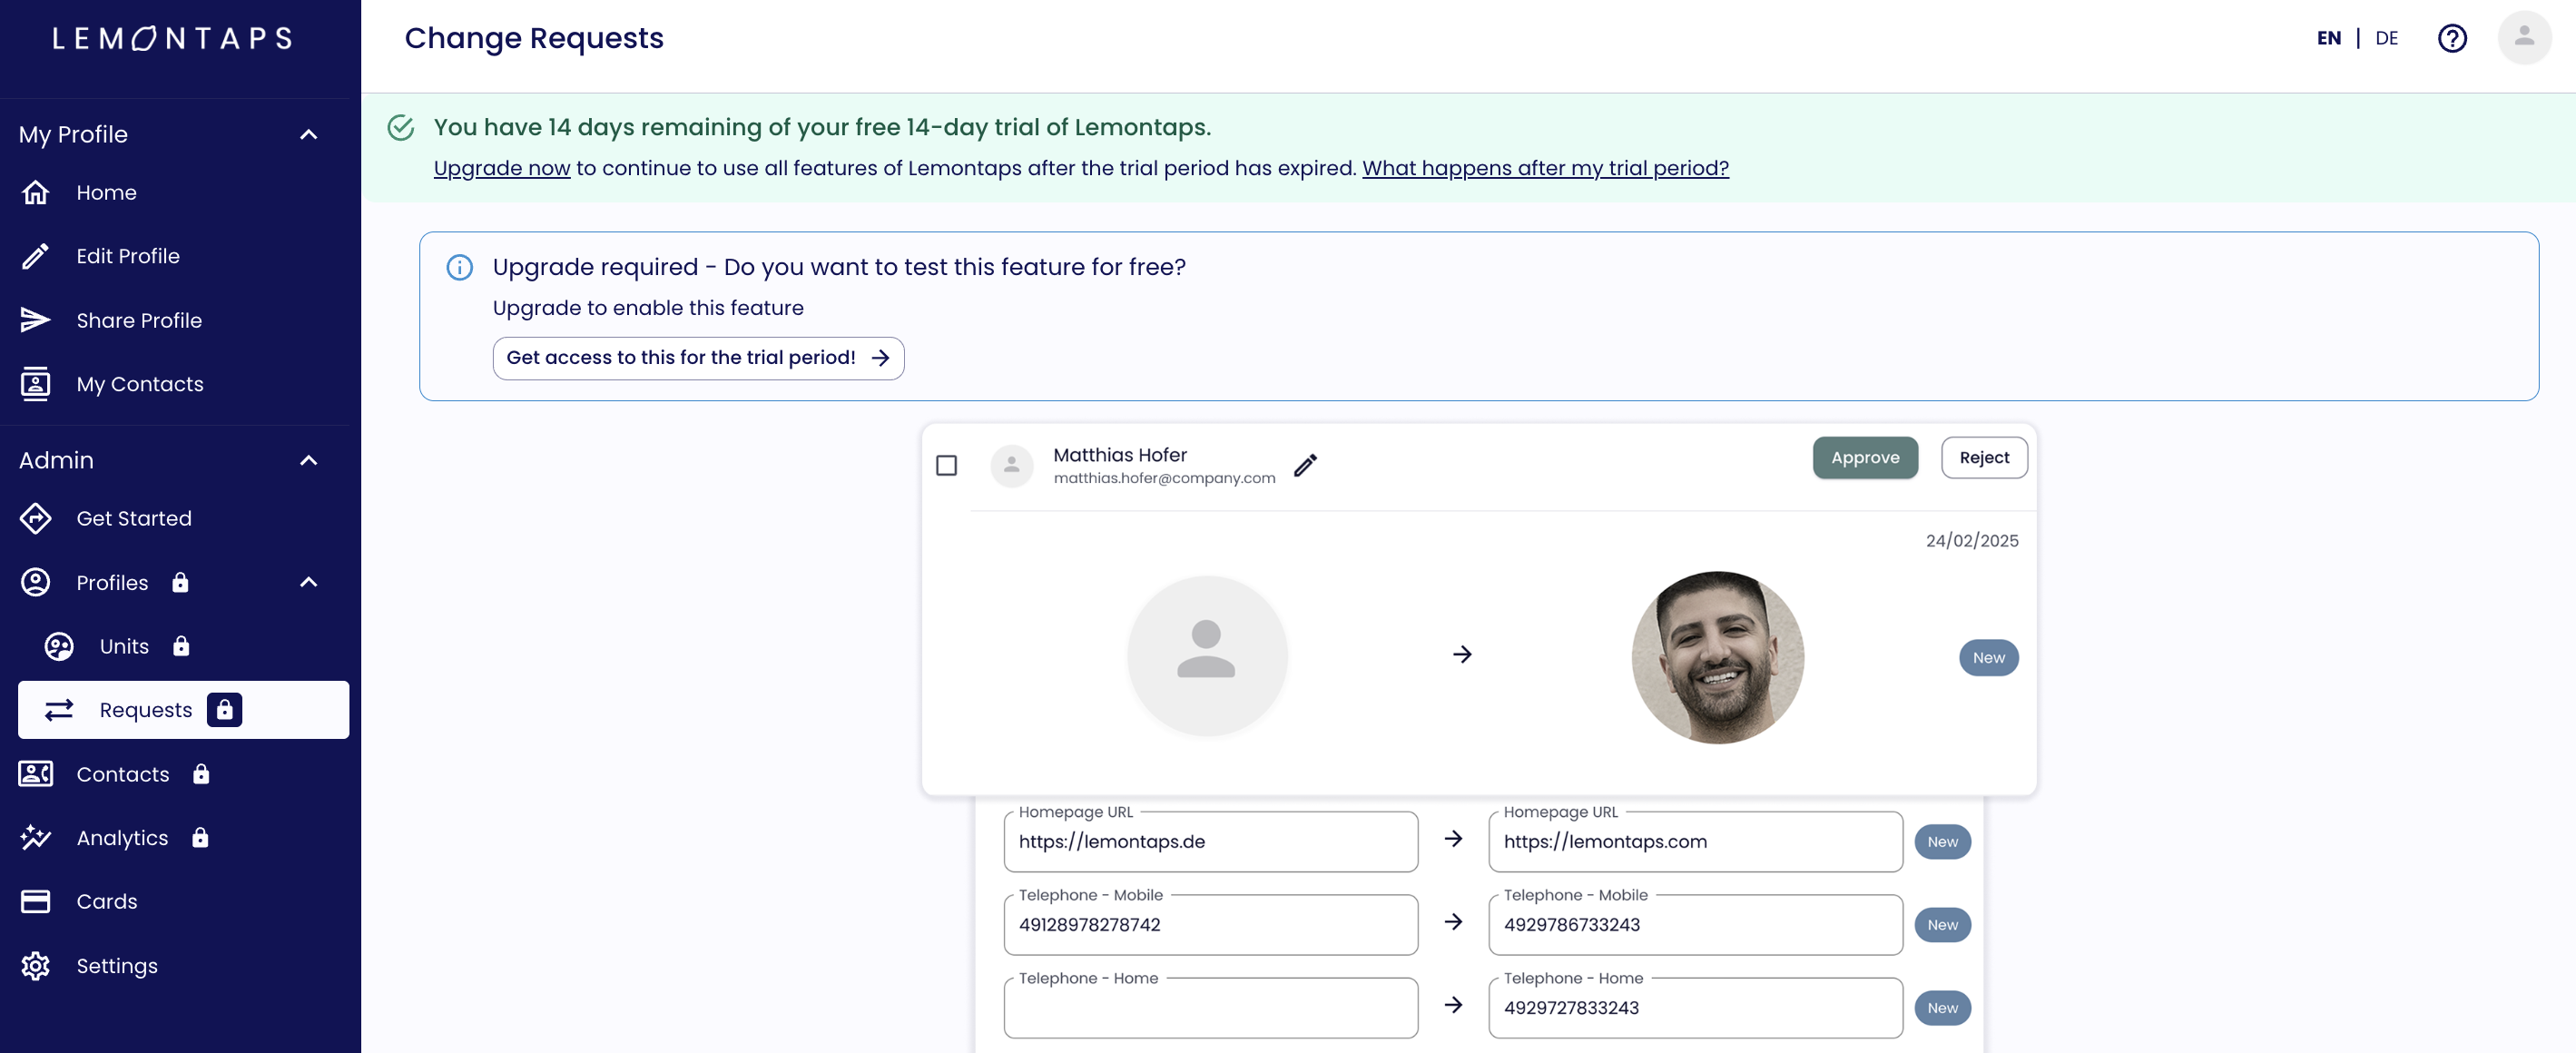
The approval page allows admins to review new self-registrations and correct missing or incorrect information. Important: The user is already active before approval.