Requirements: Administrator · Email Signature Add-on
Global components are reusable building blocks that you create once and insert into any number of signature templates. When you update a component, the changes are automatically applied to all templates that include that component—without having to edit each template individually.
Typical use cases include a company-wide legal disclaimer or a time-limited event banner.
Create a Component
- Navigate to Email Signature → Components.
- Open the Global Components section.
- Click Create Component.
- Enter a descriptive name, such as "Legal Disclaimer" or "Trade Show Banner May".
- Choose the content type:
- HTML / Drag-and-Drop Editor – for components with text, columns, images, and full layout control.
- Image Upload – for simple banners without additional design customization.
- Create the content in the editor or upload your image.
- Click Save Component.
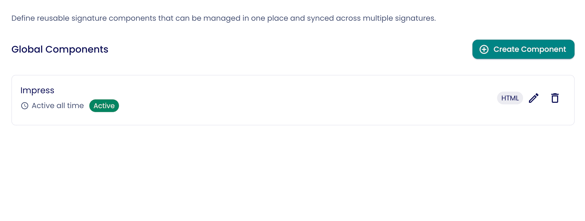
The new component will then appear in the overview with the status "Active".
Add a Component to a Signature Template
- Open the desired signature template under Email Signature → Templates.
- In the editor sidebar, you will find two sections: Content (standard blocks) and below that Global Components.
- Drag and drop the desired global component to the preferred position in the template.
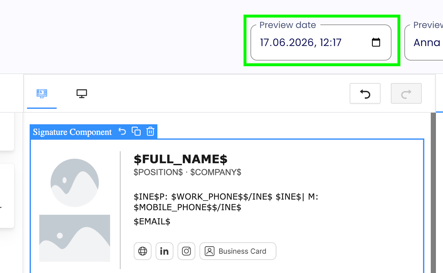
- In the editor, the component is displayed as a box showing its name—the actual content is only visible in the preview.
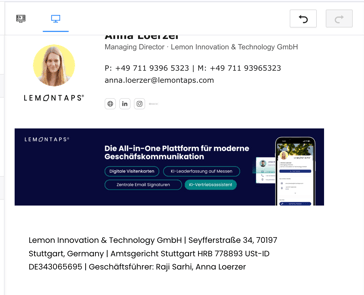
- Click Preview to review the final result.
Editor View: 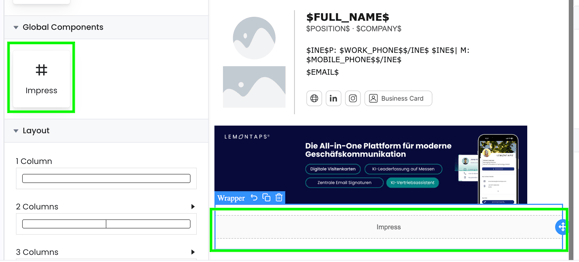
Preview:
Edit a Component
- Return to the Global Components overview.
- Click the pencil icon on the component you want to edit.
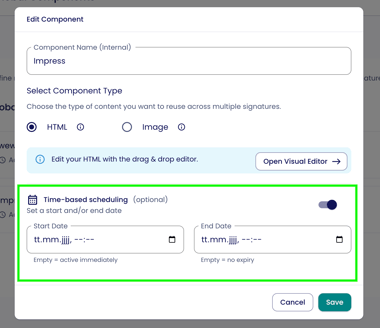
- Depending on the component type:
- For HTML content, open the Visual Editor.
- For images, remove the existing image and upload a new one.
- Make your changes and click Save Component.
The update is automatically applied to all templates where the component is used. You do not need to open or save the templates individually.
Set Up Time-Based Scheduling
You can define the period during which a component is active—for example, for a trade show banner that should only be displayed on specific dates.
- Open the component in the overview.
- Enable Time-Based Scheduling and define the start and end dates.
- Click Save Component.
As soon as a time-based component is included in a template, a Preview Date Selector appears in the template editor. This allows you to check how the template will look on a specific date—for example, after a banner has expired.
Important: The Preview Date Selector is only displayed if at least one time-based component is included in the template.
Notes
-
Components cannot be edited directly within the signature template. Changes can only be made in the Global Components management area.