.svg)
This guide walks you through setting up Single Sign-On (SSO) first and then SCIM User Provisioning with Microsoft Entra ID.
Recommended order- Set up SSO
- Configure SCIM Provisioning
Note: Administrator access and the corresponding Lemontaps add-on are required to configure SSO and SCIM Provisioning.
Preparation
Before you begin, make sure you have:
- Administrator access to Lemontaps
- Administrator access to Microsoft Entra ID
- The SSO/SCIM add-on enabled in your Lemontaps subscription
- Your verified company domain available
- Test users created in Microsoft Entra ID
- User attributes maintained in Entra ID, such as:
- First name
- Last name
- Email address
- Job title
- Department
- Phone number
Important: Always test the configuration with a small group of test users before enabling it for your entire organization.
Part 1: Set Up SSO with Microsoft Entra ID1. Start the SSO setup in Lemontaps
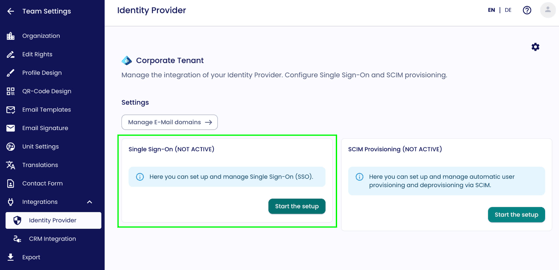
1. Go to Identity Provider and click Start Setup Now.
-
Get Started → Entra ID → Next
-
Follow the setup wizard in the platform through the four configuration steps.
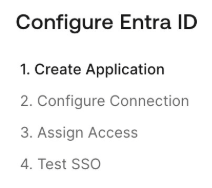
Important: If you plan to use both SSO and SCIM, create an Enterprise Application in Microsoft Entra ID.
If you only need SSO, use App registrations as shown in the screenshots within the Lemontaps setup wizard.
2. Create an Enterprise Application in Microsoft Entra ID
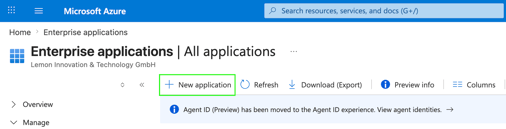
Go to: Enterprise Applications → New application
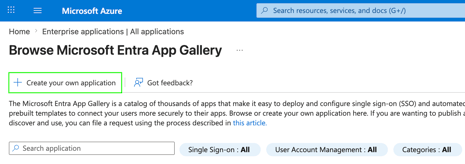
Click: Create your own application
Configure the application:
- Enter a name (for example Lemontaps)
- Select Non-gallery
(Integrate any other application you don't find in the gallery)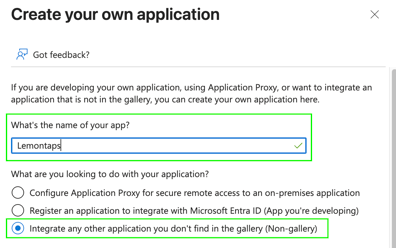
-
Click Create.
Next, open: Single sign-on → Go to application
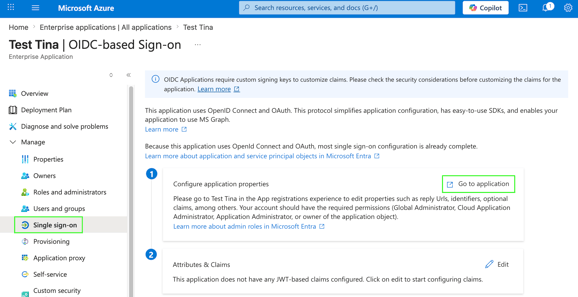
Copy the following information, as you will need it in the next step:
- Application (Client) ID
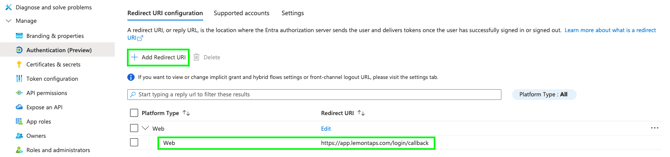
Now go to: Manage → Authentication and then Create a new Redirect URI.
Use the following Callback URL: https://app.lemontaps.com/login/callback
Next, go to: Manage → Certificates & secrets
- Click New client secret (Choose a name and expiration period)
- Copy the value shown under Value
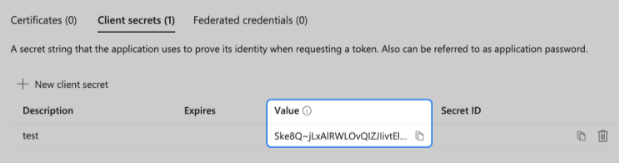
Important: The client secret value is displayed only once.
3. Configure the connection in Lemontaps
In Step 2 – Configure Connection, enter:
- Microsoft Entra ID Domain
- Client ID
- Client Secret
- Callback URL
4. Assign users
In Microsoft Entra ID, open your newly created Enterprise Application.
Navigate to: Manage → Users and Groups → Add user/group
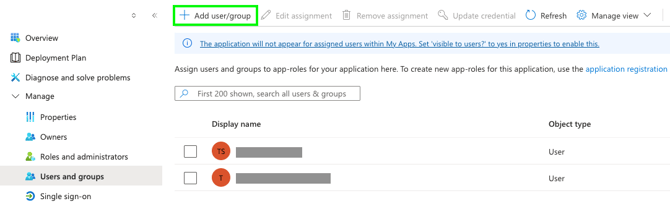
Select the users (or groups) you want to assign and click Assign.
5. Test the SSO connection
Click Test Connection.
A new browser window will briefly open and can be closed again.
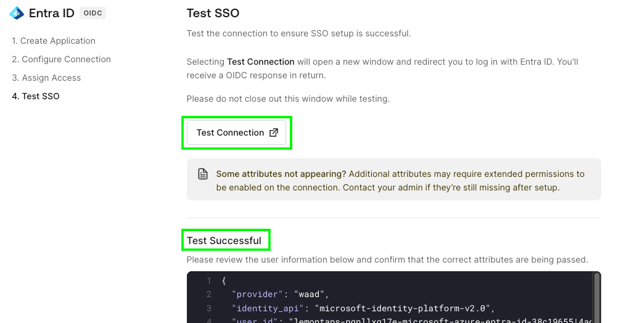
Once the test is complete, you'll see whether the connection was successful.
Click Done.
Part 2: Set Up SCIM User Provisioning
Only users with verified email domains can be provisioned.
Before configuring SCIM, verify your organization's email domains. For more information, see the article about Email Domain Verification.
1. Enable SCIM in Lemontaps
Go to: Organization → Authentication → SSO / SCIM
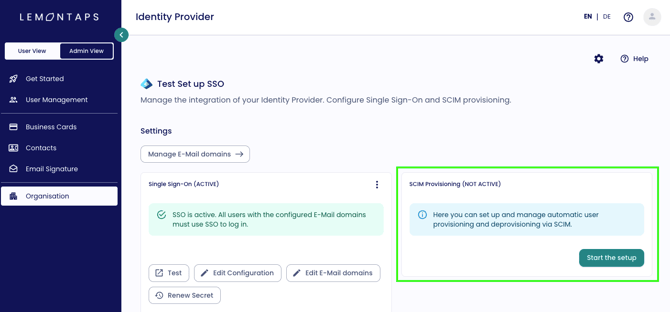
Click: Start Setup Now → Next
Copy the following information into your identity provider:
- SCIM Base URL
- API Key
If prompted for a Unique Identifier, enter" userName"
2. Enable Provisioning in Microsoft Entra ID
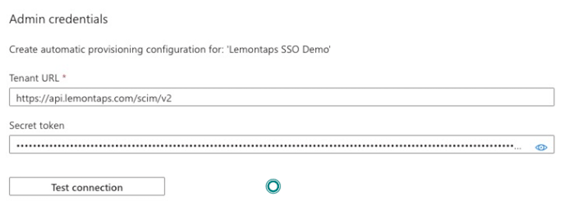
Open the same Enterprise Application in Entra ID and navigate to:
Provisioning → New Configuration
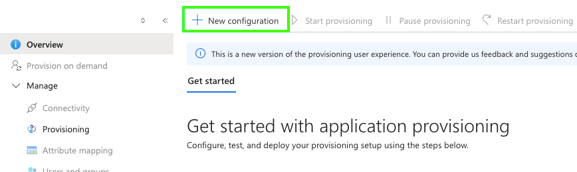
Enter:
- Tenant URL → SCIM Base URL
- Secret Token → API Key
-
Click: Test connection → Create
Return to the Lemontaps setup wizard:
- Click Next
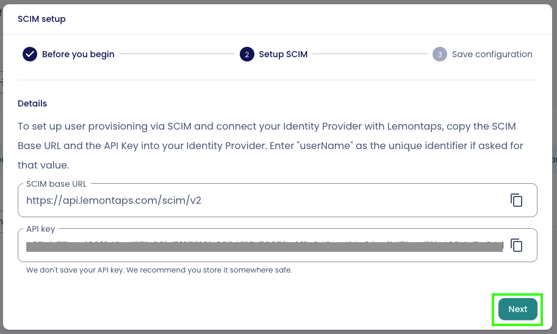
- Click Save SCIM Configuration
3. Verify the attribute mapping
Go to: Provisioning → Attribute Mapping → Provision Microsoft Entra ID Users
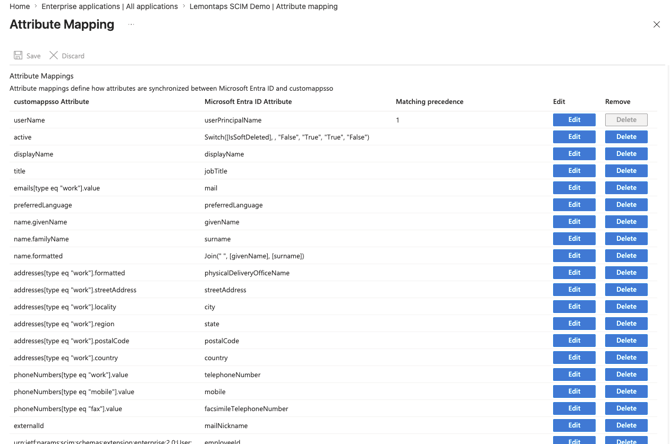
Verify the following:
- Are all required attributes available?
- If not, click Add New Mapping
Examples:
mail→emailsjobTitle→titledepartment→department
Add a new mapping
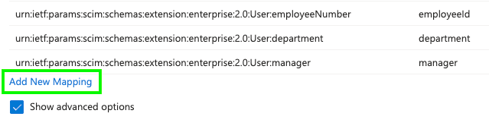
Select:
- Source Attribute
- Target Attribute
Then click OK.
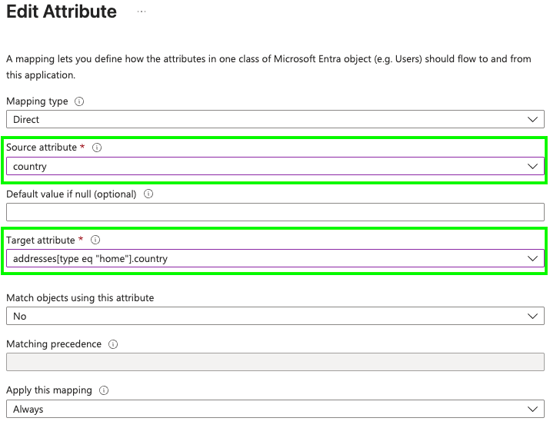
Also verify that the correct fields are mapped, for example:
title→jobTitleemails→mail
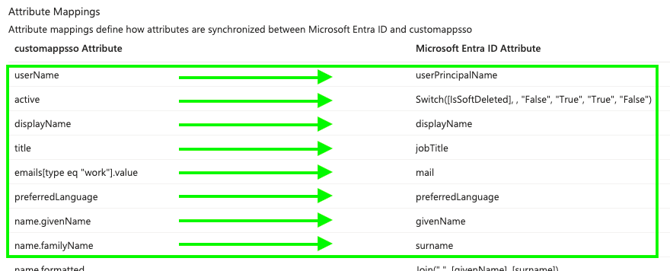
The left side displays data from the source system (Azure/Entra ID), while the right side displays the attributes sent to Lemontaps.
Only correctly mapped attributes will be synchronized.
Add missing attributes
If an attribute is missing, enable Show advanced options.
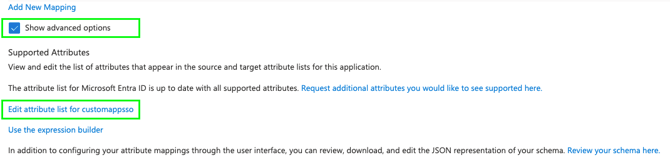
Then click: Edit attribute list
Add the missing attribute at the end of the list using the same format.
Example:
urn:ietf:params:scim:schemas:extension:enterprise:2.0:User:academicDegree

Click Save.
Next, add the same attribute in Lemontaps by opening:
Edit Mapping
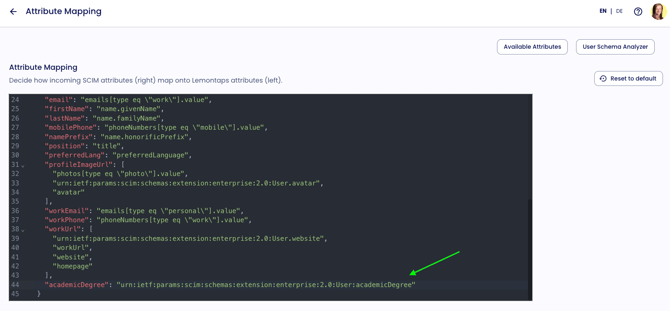
Finally, click: Apply Mapping Again
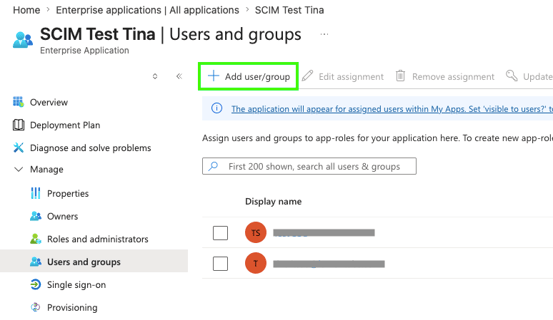
4. Assign users or groups
Go to: Users and Groups
Add a test user or test group: None Selected → Select → Assign
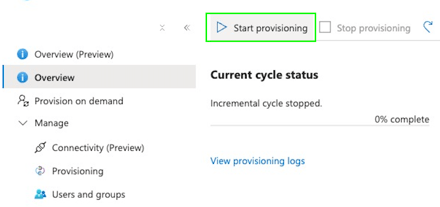
5. Start provisioning
Go to: Provisioning → Start provisioning → Yes
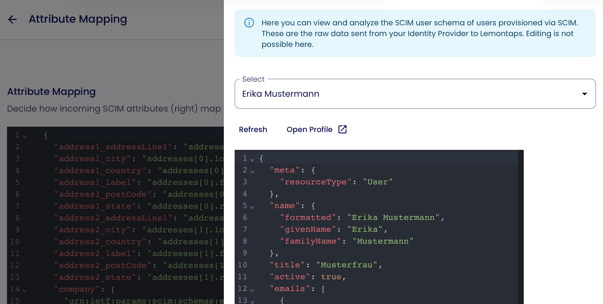
6. Verify incoming data in Lemontaps
Navigate to: Identity Provider → SCIM → Edit Mapping → User Schema Analyzer
Here you can review all attributes received for each user.
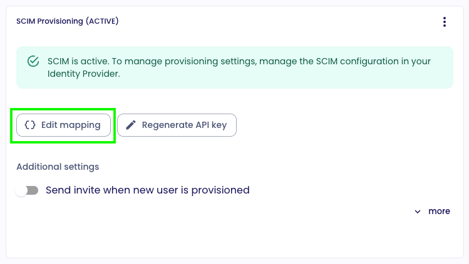
7. Verify the mapping in Lemontaps
Go to the SCIM setup in the Identity Provider overview and click: Edit Mapping
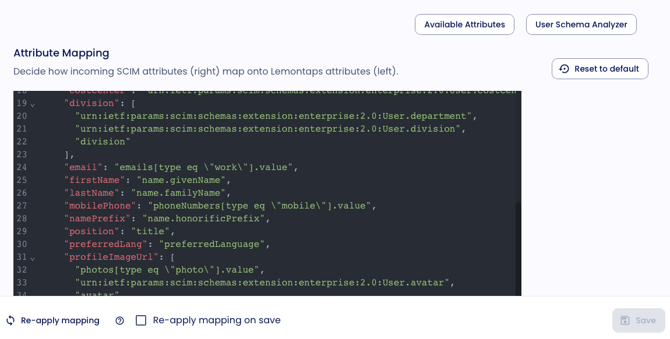
Verify that the incoming SCIM attributes are mapped to the correct Lemontaps fields.
Examples:
email→emailsposition→title
The left side displays the Lemontaps attributes, while the right side displays the incoming SCIM attributes from Microsoft Entra ID.
8. Apply the mapping again
If you change the mapping, you must apply it to all existing users.
Click: Apply Mapping Again
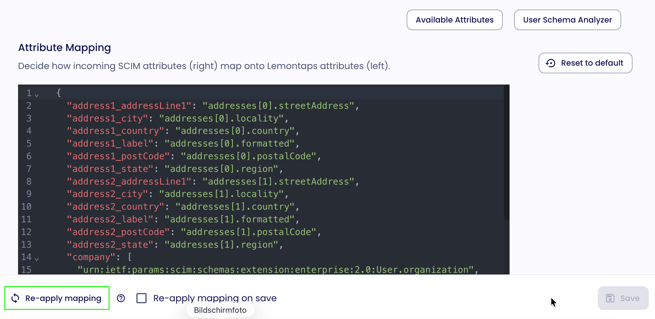
This updates the attribute assignments for all existing users.
9. Set up automatic unit assignment rules (optional)
In addition to attribute synchronization, you can have users automatically assigned to a unit during provisioning based on their attributes (e.g. by company, name prefix, or job title).
Prerequisite: The target unit must already exist in Lemontaps.
Go to Organisation → SSO / SCIM → Unit Assignment Rules and set up one or more rules.
Important: Rules only apply at the time of synchronization. To apply them to already-provisioned users, synchronization must be re-triggered in Entra ID (e.g. via "Provisioning → Restart provisioning").
For a detailed guide, see the article SCIM User Provisioning Setup, section "Automatic Unit Assignment Rules".
Related articles: