.svg)
1. Requirements
Note: Please make sure that you have API access to one of the Salesforce editions in order to be able to use the integration with Lemontaps: See Salesforce editions with API access here. You must also have administrator rights to set up the link.
2. Overview of the integration
With the Salesforce integration, either only administrators or also end users can push the contacts recorded with Lemontaps to Salesforce as leads or contacts either automatically or manually. This works for both the mobile version and the desktop version.
User Journey:
- Case 1 - When manual push is enabled, select the contacts you want to export using the checkboxes in both the "Admin contact overview" and the "End-user contact overview", then click on Hubspot.
The export will then be initiated. - Case 2 - Automatic push: If you have selected “automatic push” in the settings, the push to Salesforce is started automatically for every new contact. Previous contacts are not pushed automatically. If you want to have the previously recorded contacts in the CRM as well, you would have to push them once.

- Status of the export: In the contact table, you can see the status in the “Export” column. If you click on the symbol, you can see further information, e.g. when the export took place. If there is an exclamation mark behind the Salesforce symbol, you can see that the export has failed. If you manually push the contacts, you will also always receive an email with the number of contacts for which the export worked/failed.


The following attributes are transferred:
| Predefined fields in Lemontaps | Contact | Lead |
| Notes |
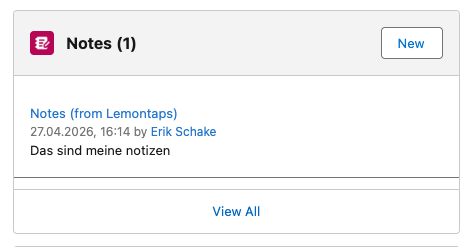
Yes, a new note entry is created in “Related List: Notes.”
|
Yes, a new note entry is created in “Related List: Notes.”
|
| Name prefix | Yes | Yes |
| First name | Yes | Yes |
| Last name | Yes | Yes |
| Position | Yes | Yes |
| Role | No | No |
| Department | Yes | No |
| Company | No | Yes |
| Yes | Yes | |
| Email work | No | No |
| Phone work | Yes as "Phone" | Yes as "Phone" |
| Phone Mobile | Yes as "Phone" | Yes as "Phone" |
| Fax | Yes | Yes |
| Website | No | Yes |
| Addressee | No | No |
| Address line 1 | Yes | Yes |
| Address line 2 | No | No |
| Zip code | Yes | Yes |
| City | Yes | Yes |
| Country | Yes | Yes |
| DSGVO | No | No |
| Language | No | No |
| Profile picture | Yes (appears under “Notes & Attachments” and "Files") | Yes (appears under "Files") |
| Paper business card image | Yes (appears under “Notes & Attachments” and "Files") | Yes (appears under "Files") |
| File attachments | Yes (appears under “Notes & Attachments” and "Files") | Yes (appears under "Files") |
| Met on | Yes | Yes |
| Met by | is created as “Contact Owner” if the Lemontaps user's account email is also a Salesforce user.
If the Lemontaps user's account email is not a Salesforce user, the Salesforce user who set up the Lemontaps - Salesforce integration is used as the owner. |
Is created as “Lead Owner” if the Lemontaps user's account email is also a Salesforce user.
If the Lemontaps user's account email is not a Salesforce user, the Salesforce user who set up the Lemontaps - Salesforce Integration is used as the owner. |
|
Lead Source: Lemontaps (Will be added automatically) |
Lead Source: Lemontaps (Will be added automatically) |
Contact vs. Lead
In the settings under section 2, you can define whether contacts captured with Lemontaps should be created in Salesforce as a Contact or as a Lead.
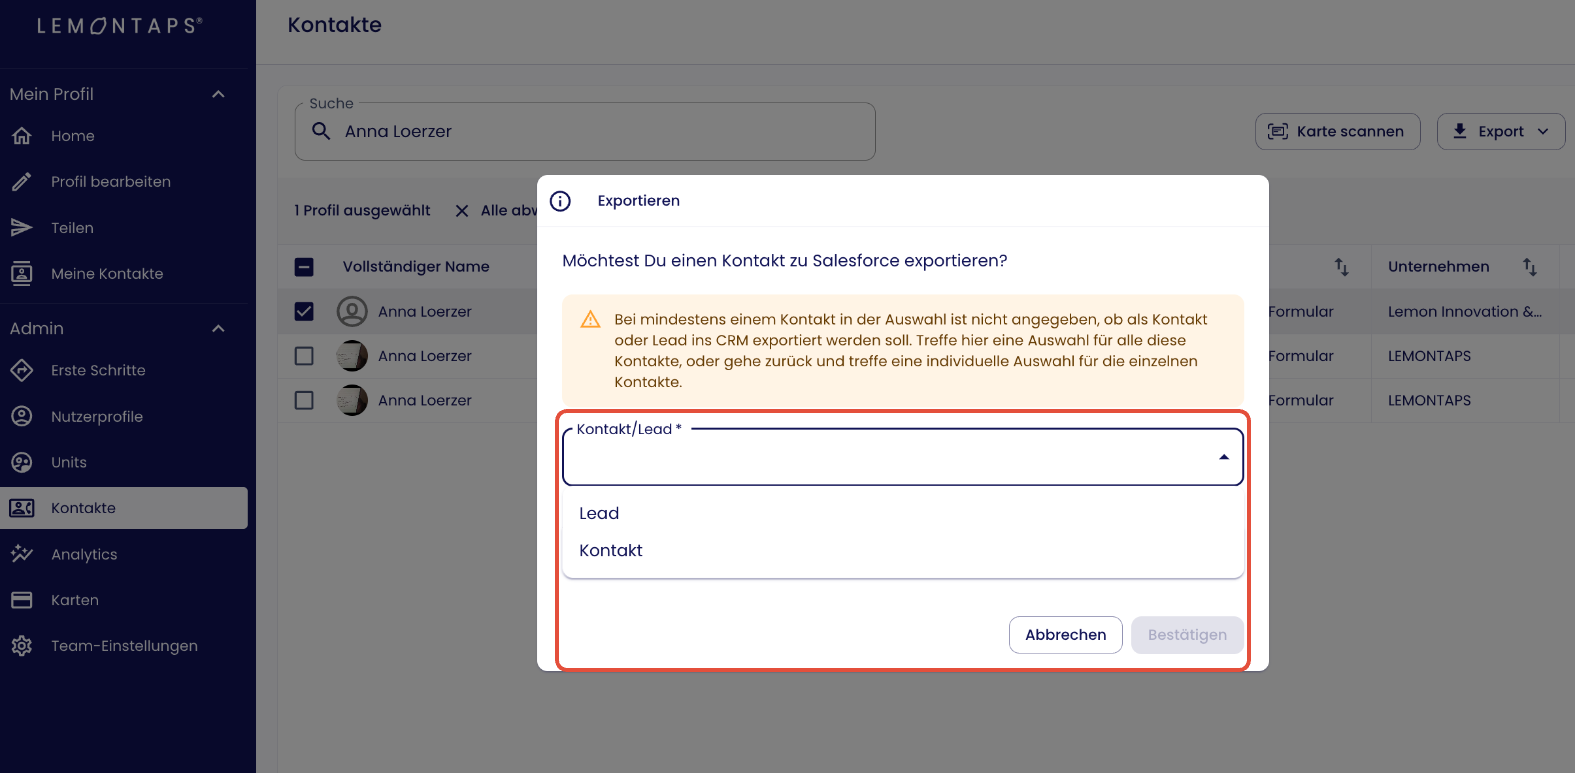
Alternatively, you can let your users decide. In that case, a popup will appear before export where they can choose whether the record should be created as a Contact or a Lead.
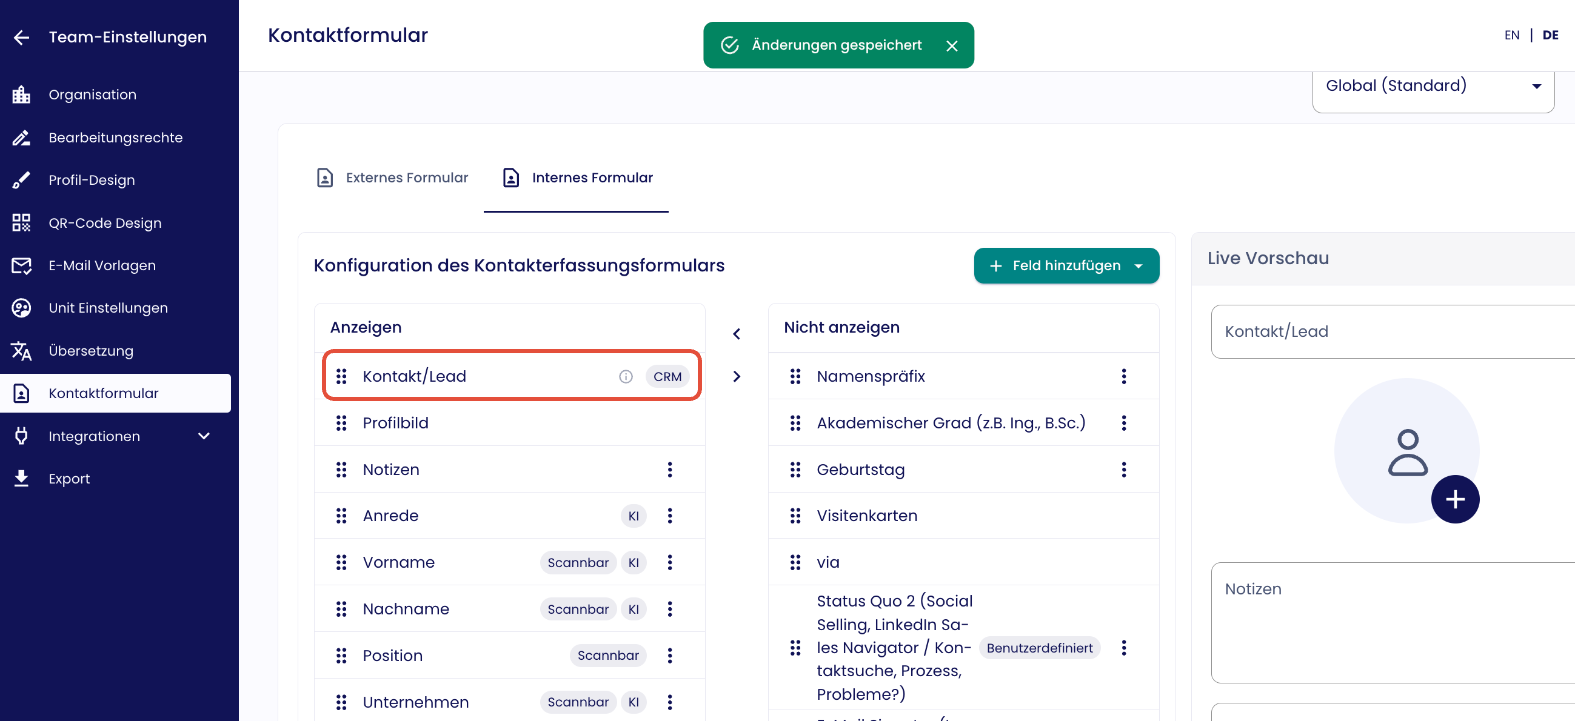
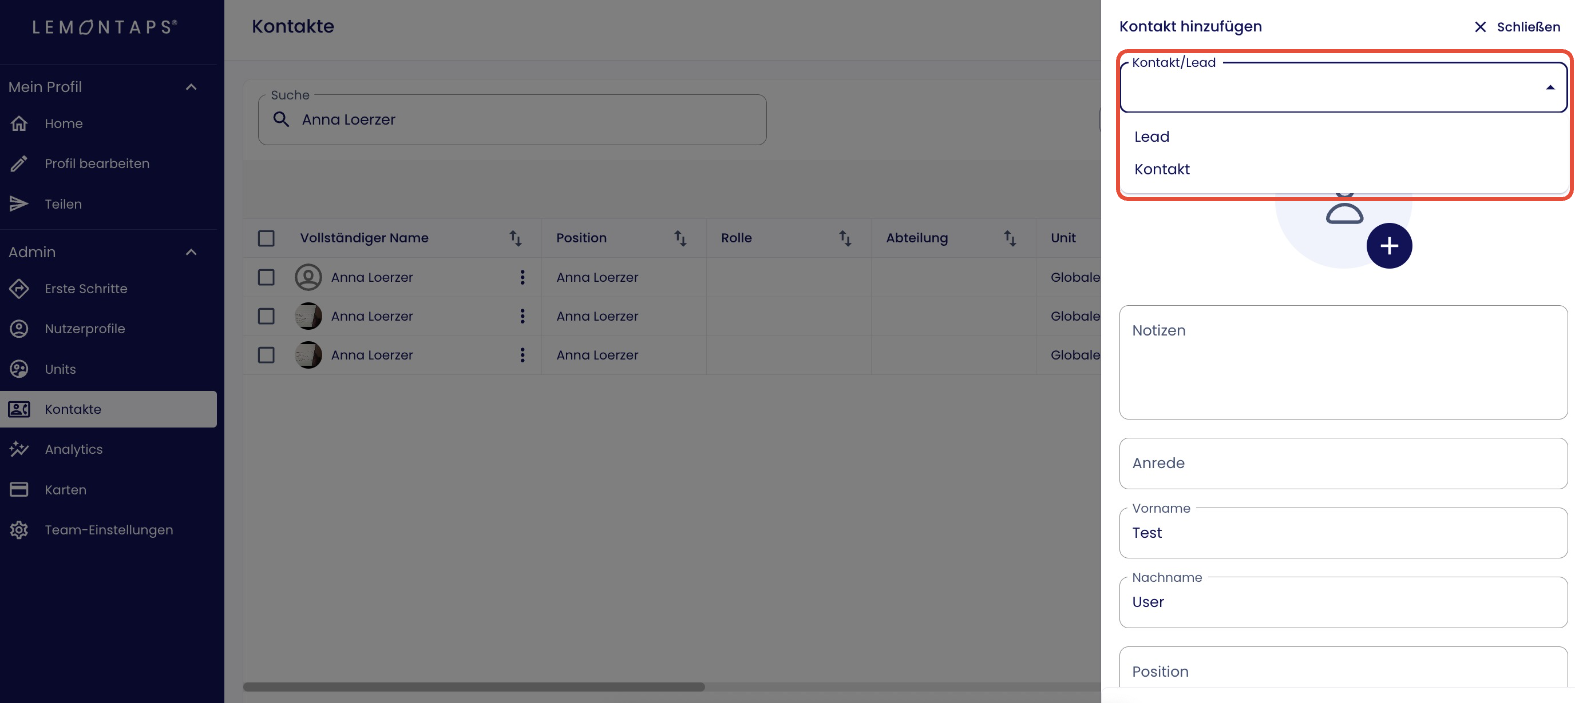
Additionally, you can integrate this selection directly into the lead form. This way, users are asked during capture whether the record should be a Contact or a Lead. If this information is already provided there, no additional popup will appear during export.
User-defined fields:
If you have created custom fields in Salesforce itself, you can also make them visible in the Lemontaps lead form.
- Navigate to Contacts → Contact Fields → Internal Contact Form.
- Click on “Re-import CRM fields”.
- Then click on “Add field” → “CRM Custom Field” and select the custom field you want to add.
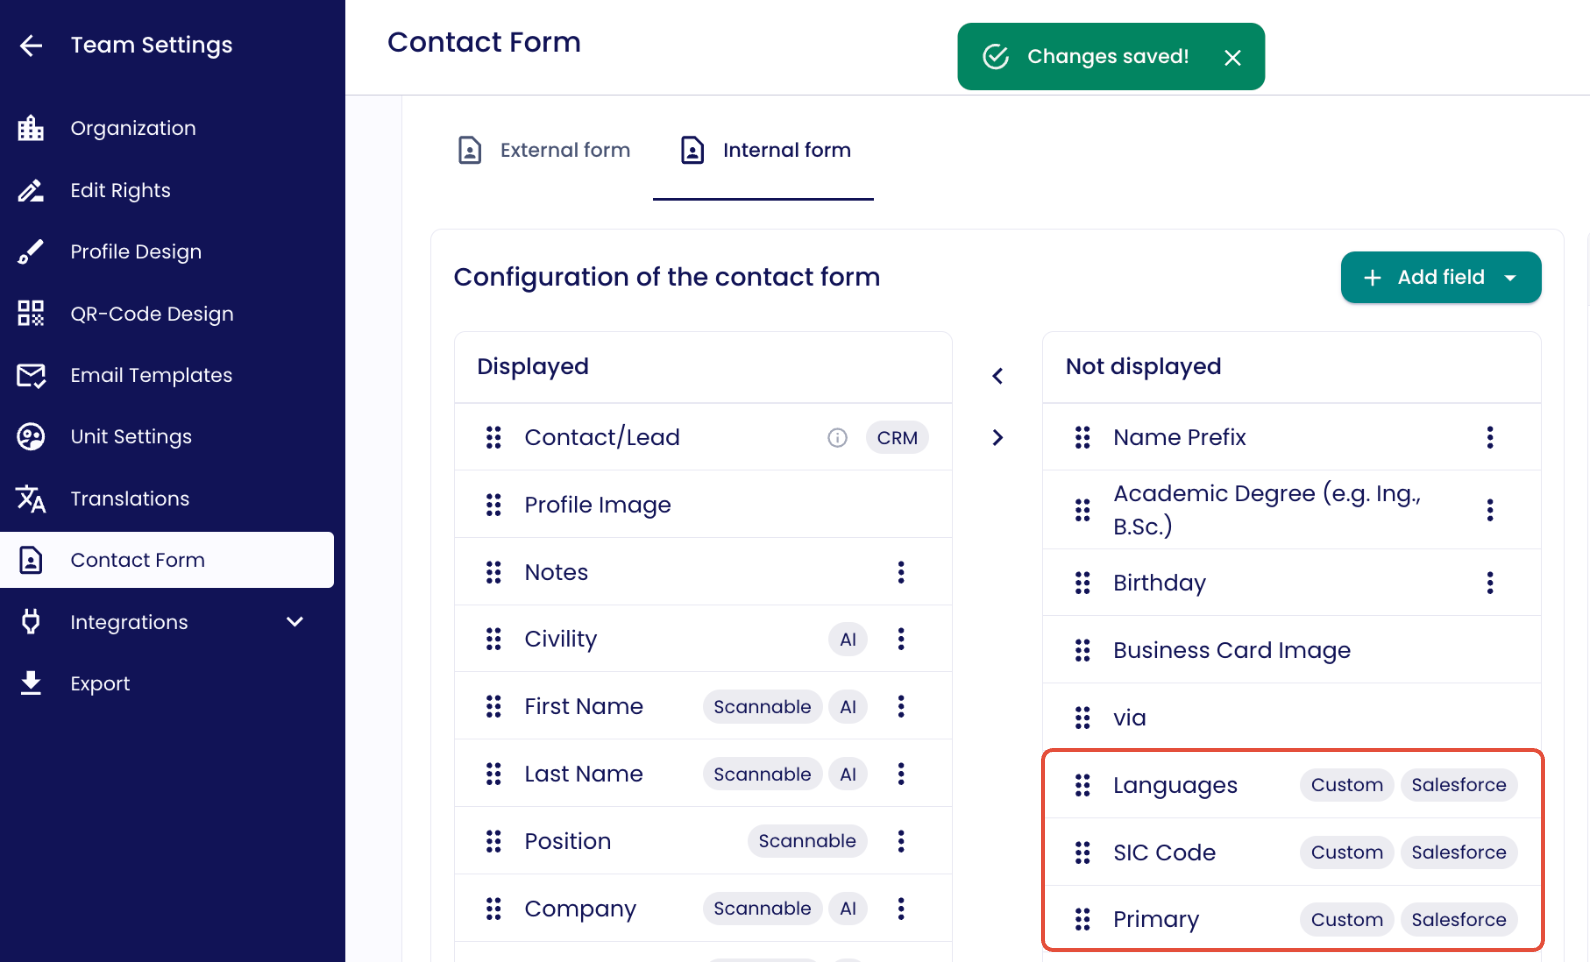
The custom fields from Salesforce will then be displayed in Lemontaps.
If you now fill in the custom fields via the Lemontaps lead form and export the contact to Salesforce, the correct field will be filled in.
Automatically Transfer Scan, AI & Event Data to Your CRM
Lemontaps can automatically transfer scan, AI enrichment, and event results to CRM fields during export. You set up the mapping once — after that, everything runs automatically.
The setup is done in the Contact Form. For a step-by-step guide, see the article Map Scan, Enrichment & Event Results to CRM Fields.
Custom fields without CRM mapping
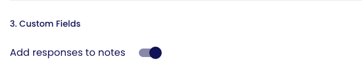
Fields from your Lemontaps lead form that are not linked to Salesforce (e.g. trade show–specific information) are not automatically transferred to the CRM. If you don’t want to create a dedicated field for these in Salesforce, you can instead store this information in the notes field of Salesforce.
You can find the relevant setting here under section 3 “Custom Fields.”
Permissions
Can individual users also transfer contacts to Salesforce, or only admins?
You can configure this in the settings for editing permissions here (Point 12).
Automatic / Manual Export
Should newly captured contacts be exported to Salesforce automatically or manually?
You can define this here under section 1.
Duplicates:
If there is already a contact/lead in Salesforce with the same email address as the contact you want to push from Lemontaps, you can define how this should be handled under section 5, “Update existing CRM contact”, in the advanced settings of the CRM integration:
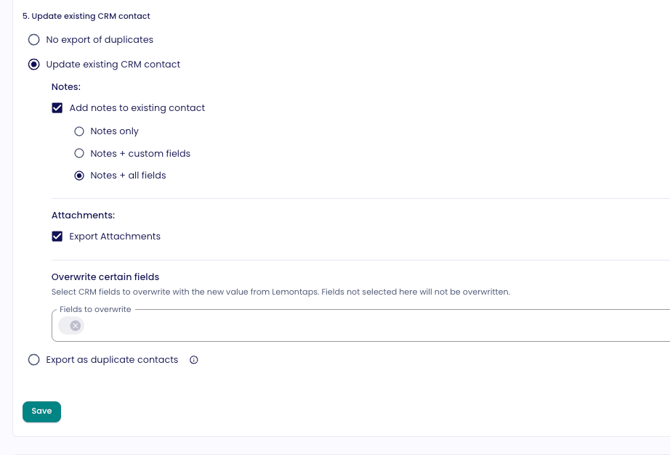
- Do not export duplicates
- The export will not be performed, and the reason will be displayed in the export column. For manual exports, you will also receive an email notification.
- Update existing CRM contact
- Instead of canceling the export, the existing contact/lead in Salesforce will be updated. The following options can be enabled independently:
- Notes: Enable “Add notes to existing contact” and select what should be transferred (Notes only / Notes + custom fields / Notes + all fields).
- Attachments: Enable “Export attachments” to also transfer files such as the profile picture or business card image.
- Overwrite specific fields: Use the “Fields to overwrite” field to select which Salesforce fields should automatically be overwritten with the new value from Lemontaps. Fields that are not selected will not be overwritten.
- How to set it up: 1. Navigate to Contacts → CRM Integration → Advanced Settings. 2. Scroll down to section 5, “Update existing CRM contact,” and select this option. 3. Scroll down to “Overwrite specific fields” and select the desired fields from the “Fields to overwrite” dropdown. 4. Click “Save.”
- From now on, whenever the contact is exported again, each selected field will automatically be overwritten with the current value from Lemontaps. This is useful, for example, if a contact attends a new event and should automatically be synchronized with the latest event data.
- Important: First name and last name cannot be overwritten individually. They must be stored as one combined value (first and last name together).
- Instead of canceling the export, the existing contact/lead in Salesforce will be updated. The following options can be enabled independently:
- Export as duplicate contacts
- The contact will be created as a new, additional contact/lead regardless of the existing duplicate.
- The contact will be created as a new, additional contact/lead regardless of the existing duplicate.
Campaigns:
It is possible to assign contacts that are pushed to Salesforce to a campaign.
To do this, go to Contacts → Contact Fields and scroll down to “Campaign Assignment.”
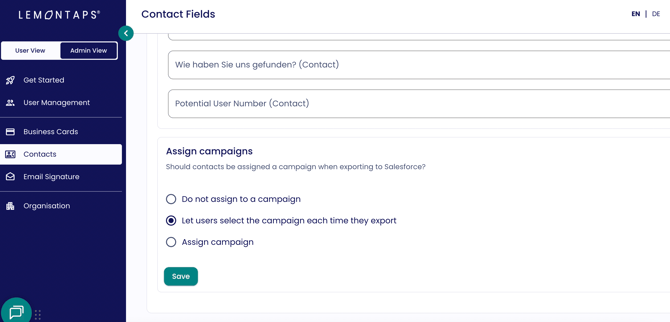
Here, you have the following options:
- Select one specific campaign that will be applied to all exports to Salesforce.
- Choose for each export individually whether a campaign should be assigned and which one.
- Export contacts without assigning any campaign.
If you select the option to choose a campaign individually for each export, you can do this later under “My Contacts” (and for admins, also under “Contacts”).
3. Linking Lemontaps with Salesforce
- Navigate to the Contacts → CRM Integration.
- Click on Salesforce

- Now click on “Authorize Salesforce”

- A popup from Salesforce will now appear. Enter your login details. In most cases, you must have administrator rights with Salesforce.
- Now authorize Lemontaps in the following popup.

- Voilá Salesforce is now connected. You can now close the popup. Please note: You do not need to do anything in the “Leads”, “Contacts” etc. fields.

5. FAQs
My export has failed, what could be the reasons for this?
Note: If an export fails, an error message will be displayed. You can view the details by going to “Contacts” and clicking the small icon in the “Exports” column.

1) Missing information in the contact in Lemontaps:
- For contacts, at least one name must be provided in the Lemontaps contact - either a first name or a last name - as well as all other fields marked as required. Otherwise, issues may occur during export.
For leads, at least the company name and one name (first or last name) must be provided in the Lemontaps contact, along with all other required fields. If these requirements are not met, the export will fail.
2) Duplicate:
- The email address of the contact in Lemontaps already exists in Salesforce for a lead or contact. It may be that the email address also exists elsewhere in Salesforce and therefore prevents the export - in this case you should check your own Salesforce rules to see how the duplicate settings were made.
3) Refresh:
- With automatic synchronization, it is sometimes necessary to refresh the page to see the corresponding icon if, for example, a new contact has been created.
- Updates to contacts in Lemontaps are not automatically updated in CRM.
4) Error Message – INVALID FIELD:
-
This message indicates that the Salesforce user does not have access to certain fields such as Description or Lead Source.
-
Solution:
Make sure that the connected user has read and write access to the Description field in the Lead object.Here’s how:
-
Go to Setup > Object Manager > Lead.
-
Click on Fields & Relationships and select Description.
-
Click on Set Field-Level Security.
-
Enable "Visible" and disable "Read-Only" for the user or profile.
After that, the export should work properly.
-
5) Other reasons:
- It may still not work. Try exporting the contact again. If it still does not work, please contact support@lemontaps.com.
What happens to duplicate entries?
The export stops as soon as a duplicate email address is indexed. No new contact will be added in the CRM. Therefore, the current contact won't be updated.
Can duplicates be updated?
No, duplicates won't be updated in the CRM. The Lemontaps contact won't get exported – The action fails.
Is the Integration GDPR-Compliant?
Yes, it is. You can find more information here.
How do I handle required fields from Salesforce?
If you have defined required fields in Salesforce, these fields will automatically appear in the setup popup in Lemontaps.
You have several options to handle them:
- Use the same values for all leads/contacts
- Enter the desired values directly in the popup.
- These values will then be applied to all contacts or leads exported to Salesforce.
- Collect required fields individually in the lead capture form
- If these required fields are important for your process, you can add them directly to the Lemontaps lead capture form so they are filled in during contact creation.
- Navigate to Contact Form → Internal Contact Form.
- Click “Re-import CRM fields”.
- Click “Add field” → CRM Custom Field.
- Select the custom field you want to add.
This ensures that your colleagues fill in all required fields directly during lead capture, preventing export errors later on.
I can’t see the “Notes” box in Salesforce – what can I do?
If you can’t see the “Notes” box in Salesforce, it’s usually because it hasn’t been added to the relevant page layout yet.
Here’s how to check and fix it:
- Go to Settings (Setup) in Salesforce
- Open the Object Manager
- Search for the object, e.g. “Contact” or “Lead”
- Click on “Page Layouts”
- Open the layout you’re using (e.g. Marketing Layout or another one)
- Go to the “Related Lists” section
- Look for “Notes” or “Notes & Attachments”
- Drag and drop “Notes” into the desired position in the layout
- Don’t forget to save
Important:
You may need to repeat this for multiple page layouts, as different layouts can be used in different areas of Salesforce.
If you work with both Contacts and Leads, make sure to apply these steps to both objects.